Naxxramas Runbook
Quick-reference encounter strategies for raid leaders
Starting Trashtrash▾
Mob Types
Infectious Ghoul55kBasic undead melee, comes in packs
Embalming Slime45kOoze — cannot be tanked in melee, must be kited by ranged
Stoneskin Gargoyle195kStoneskin buff increases its armor; applies a debuff to players that increases damage taken
Slimes cannot be tanked in melee — they must be kited by ranged. Gargoyle Stoneskin debuff stacks and must fall off between pulls.
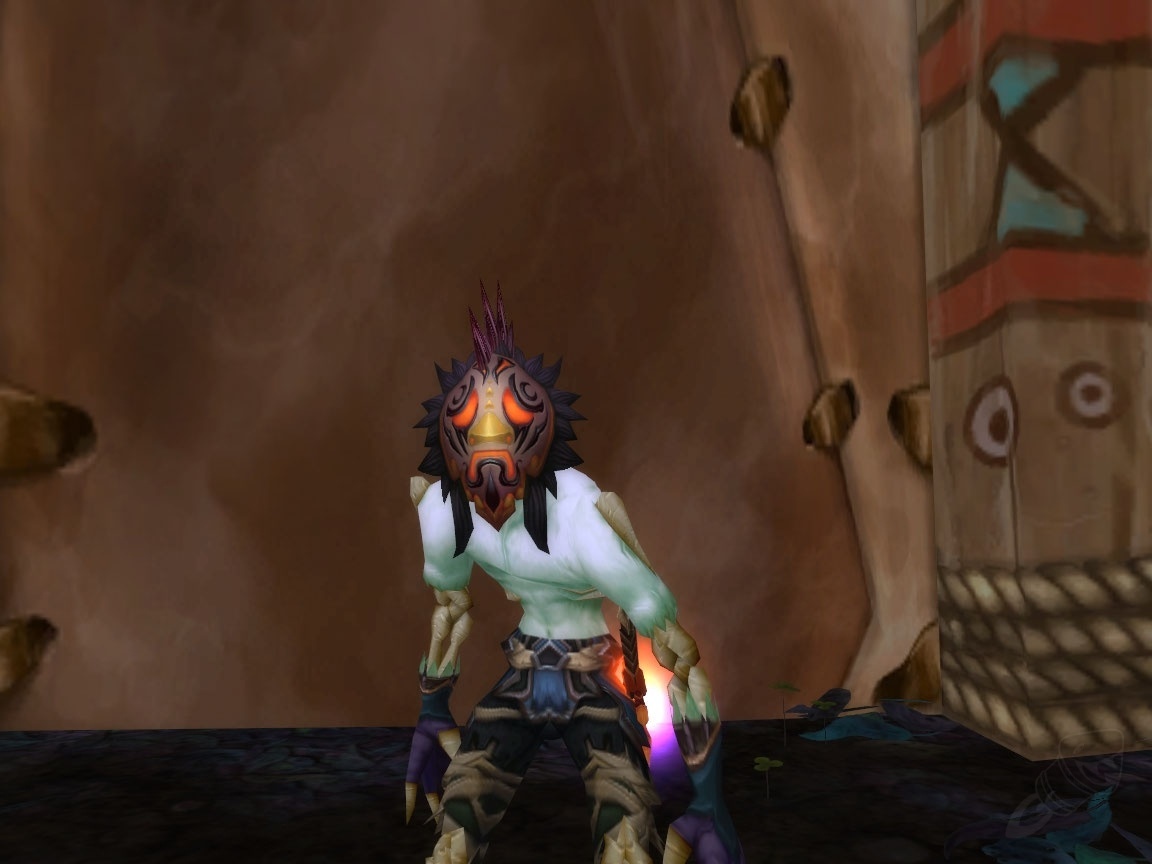
 Noth the Plaguebringerboss▾
HP: 1,665,500
Plagued Warriors spawn every 30 seconds during ground phases. Plagued Champions and Plagued Guardians spawn during balcony phases.
Boss Abilities
Curse of the PlaguebringerCurses a player. If not decursed within 10 seconds, triggers Wrath of the Plaguebringer — 1,750 Nature damage instantly plus 875-1,125 Shadow damage every 2 seconds for 10 seconds to all nearby players.
BlinkTeleports approximately 20 yards and completely resets his threat table. Every ~25 seconds. The highest-threat player after Blink will be attacked immediately.
CrippleMagic debuff: doubles attack time, reduces movement speed by 50%, and reduces Strength by 50%. Lasts 15 seconds. Dispellable.
Summon Plagued AddsSummons Plagued Warrior skeletons every 30 seconds during ground phases. During balcony phases (when Noth is untargetable), summons Plagued Champions and Plagued Guardians in waves.
Plagued Add Abilities
Plagued Warrior (34k HP)Basic skeleton — Cleave and Strike. Spawns during ground phases every 30 seconds. Off-tanks pick these up and the raid cleaves them down.
Plagued Champion (38k HP)Spawns during balcony phases. Shadow Shock (ranged Shadow damage) and Mortal Strike (reduces healing received by 50% for 5 seconds). More dangerous than Warriors.
Plagued Guardian (19k HP + mana)Spawns in later balcony phases. Casts Arcane Explosion (area-of-effect Arcane damage). Cannot be shackled. Must be killed quickly to prevent stacking area damage.
Trash to Heigan — The Infested Corridortrash▾
Mob Types
Plague Beast130kLarge mob — Stomp deals ~2,000 damage in a radius around it
Eye Stalk15kTentacles that emerge from the ground — Mind Flay (Shadow damage channel)
Maggot10kSmall adds spawning from Plague Beasts — Slime Burst slows movement by 50%
The infested corridor continuously spawns adds as you move through it — do not rush ahead or the group will be overwhelmed
 Heigan the Uncleanboss▾
HP: 1,832,050
Boss Abilities
Decrepit FeverDisease — reduces maximum health by 50% and deals 500 Nature damage every 3 seconds. 20-yard radius around Heigan. Cleansable (disease). Must be dispelled constantly on melee players.
Eruption (Safety Dance)Sections of the floor erupt dealing ~7,500 Nature damage (instant kill). Safe zones shift in a repeating pattern: zones 1, 2, 3, 4, 3, 2, 1. Phase 2 eruptions move faster.
Mana BurnArea-of-effect around Heigan — drains mana and deals Shadow damage equal to the mana drained. Only active during Phase 1 (ground phase). Affects melee range.
TeleportTeleports 3 random players into the Eye Stalk tunnel. Only during Phase 1. Teleported players must navigate back to the raid while avoiding Eye Stalk tentacles.
Positioning & Kiting
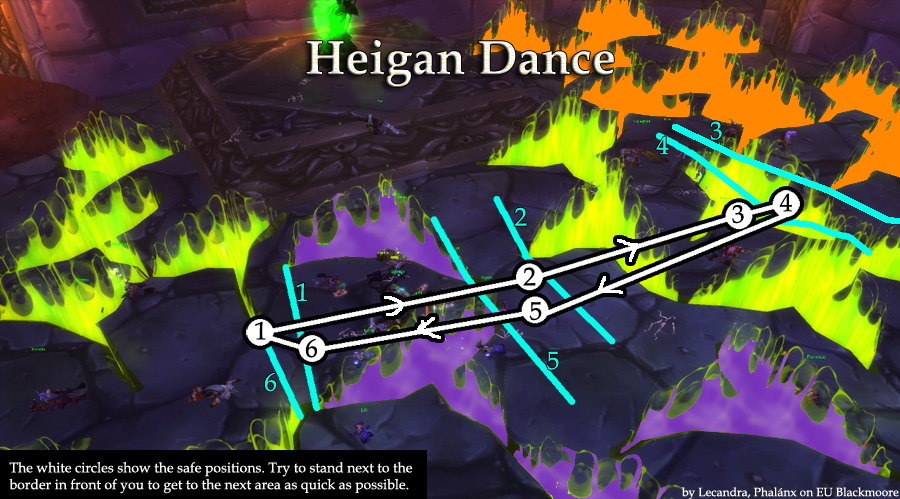
Click image to view full size
Heigan's room is divided into four zones that erupt in a repeating pattern: zone 1, zone 2, zone 3, zone 4, then back — zone 3, zone 2, zone 1, and repeat. During Phase 1, ranged players and healers stand on the raised platform at the back of the room (safe from Eruptions). The main tank holds Heigan on the floor near the platform edge. During Phase 2, Heigan teleports to the platform and poisons it — everyone must jump down to the floor and run the dance pattern through the safe zones. The diagram above shows the movement path through the four zones.
×
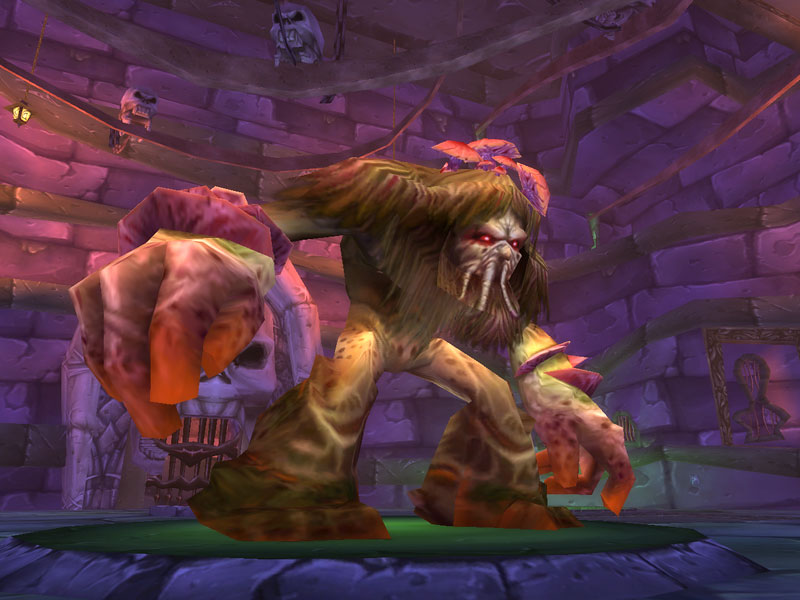 Loathebboss▾
HP: 5,329,600
Boss Abilities
Corrupted MindAfter any player casts a healing spell, ALL of their healing spells are locked out for 60 seconds. Each healer can only cast one heal per minute. This is the core mechanic of the fight.
Inevitable DoomUnavoidable 2,550 Shadow damage to all players after a 10-second debuff. Starts at 2 minutes into the fight (every 30 seconds). After 5 minutes, frequency increases to every 15 seconds.
Fungal Bloom (Spore)Spores spawn near Loatheb every ~12 seconds. When killed, grants up to 5 nearby players +50% melee critical strike chance, +60% spell critical strike chance, and zero threat generation for 90 seconds.
Remove CurseLoatheb removes all curses on himself every 30 seconds (starting ~2 seconds into the fight). Curses like Curse of Shadow or Curse of Elements must be constantly re-applied.
Poison AuraPassive aura — deals 196 Nature damage to all nearby players every 6 seconds. Low per-tick damage but constant throughout the entire fight.
Positioning & Kiting
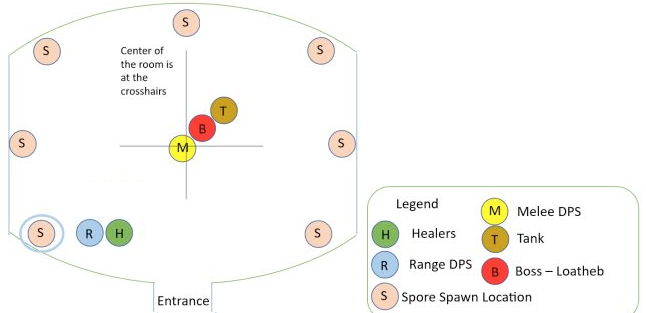
Click image to view full size
The main tank holds Loatheb in the far-right corner of the room (opposite the entrance). This causes Fungal Bloom spores to spawn in the near-left corner, close to the entrance — keeping the spore spawn location predictable and away from the boss. The raid stacks loosely near the spore spawn area. When a spore appears, the assigned 5-player group moves in close to the spore before it is killed so they receive the critical strike and zero-threat buff. All other players stay back from the spore until their group's turn in the rotation.
×